Thursday, July 31, 2014

Spiced Zucchini Cookies


Cookies, cookies, cookies.  Oh how I love cookies.  These cookies that I am going to share with you are not a sweet cookie, but more of a spiced cookie.  That is one of the reasons that I love them so much.  There is just something about a spiced cookie that appeals to me.  That and they have frosting on them.  Who doesn't love frosting?!

I made these cookies the other day, and then brought a few over to my mothers house as payment for watching my kids for me.  When I picked them up, I found out that not only did I bring these cookies, but so did my sister.  The kids thought this was great, and the only thing they said was different about the two batches of cookies, was that my sister did not frost all of the cookies, where I did.  My oldest daughter was great full for the unfrosted cookies, because she did not like the Cream Cheese frosting. 

This is a recipe that I got years ago from my sister-in-law, and love making them every time I get fresh zucchini.  I'm sure it works well with store bought zucchini as well, but I will admit I have never made it that way.  I usually only make them when I get home grown zucchini.  They have a crunch and a chewy quality that make these cookies so good.

So let's get started.

Here is what you need:
1/2 cup unsalted butter at room temperature
1 cup sugar
1 egg
2 cups flour
1 teaspoon baking soda
1 teaspoon ground cinnamon
1/4 teaspoon ground cloves (optional)
1/4 teaspoon ground nutmeg (optional)
1 cup shredded zucchini
1 cup raisons
1 cup chopped walnuts

Frosting:
1/4 cup unsalted butter at room temperature
1 8oz package cream cheese softened
1 teaspoon vanilla extract
2 1/2 cups confectioners' sugar

Shred your zucchini using a food processor and set aside.


Cream together the butter and sugar until light and fluffy.  Beat in the egg and mix well.  In another bowl combine the flour, baking soda, cinnamon, salt, and cloves and nutmeg if desired.  Add the flour to the creamed mixture alternating with the shredded zucchini.  Make sure the zucchini is mixed in well.  Stir in the raisins and walnuts.  Cover and refrigerate for 2 hours.


Preheat your oven to 375 degrees F and drop by heaping teaspoonfuls onto a baking sheet lined with parchment paper.  Bake for 12-15 minutes or until lightly browned.  Remove to a wire rack to cool completely. 


For the frosting combine the butter, cream cheese, and vanilla together until well mixed.  Gradually at the confectioners' sugar and mix until you have the desired constancy that you are looking for.  At this point you can simply take and off set spatula and frost the cookies, or you can do what I did and that is take a pastry bag and using a #21 star tip, create a neat swirl pattern on each cookie.  No matter how you frost them they still come out AMAZING!


The only thing that I recommend at this point is that any you don't eat right away, refrigerate any left overs that have frosting on them.  You don't want the cream cheese to spoil.

Happy Baking and ENJOY!! 


Wednesday, July 23, 2014

No Bake Cookies


Cookies are a staple in my house.  With three kids, there is always some type of cookie to be found.  From basic butter, to sandwich, to chocolate chip and oatmeal butterscotch, my house is never without cookies.  I love to make all different kinds, and whenever I can I love to experiment with new ways to make them as well.

My husband is probably one of the biggest consumers of cookies in our house hold.  He is known for waking up sometime during the night and sneaking some from the cookie jar.  He always makes me laugh, because he will tell me how awful they are and that he should eat them, so no one has to suffer.  Yeah right!  Like anyone is going to buy that line, but at least I know that he likes them and that what ever I did for that particular cookie I should definitely do again.

He is not a picky person when it comes to cookies either.  My kids all have their favorite, and when I ask which ones I should make, they usually all yell out at once, with three different answers, but my hubby, he doesn't care as long as I make one.  So I thought that I would treat him to HIS favorite kind of cookie and surprise him when he got home from work.

So as I began to gather up the ingredients that I need for these cookies, I kept sending him pictures of each and I asked him if he could guess what I was making.  Needless to say, by the time I got all the ingredients out, he knew exactly what I was making and was super excited that I was making them.

No bake cookies to me are a simple yet very yummy cookie.  There are only 7 simple ingredients that you can easily find in your pantry.  They take no time at all to make and once cooled they are a great snack.  My husband must have eaten a half dozen when he got home from work that night he was so excited.  I have to tell you though, these are the type of cookie that once you start to make, you cannot walk away from.  Cooking time is important and once completed they cool very fast, so you have to work fast. 

Okay.  Here is what you need.


1/2 cup Cocoa
1/2 cup Milk
2 cups Sugar
1 stick unsalted butter
3 cups Quick Cooking Oats
1/2 cup Peanut Butter
1 teaspoon vanilla

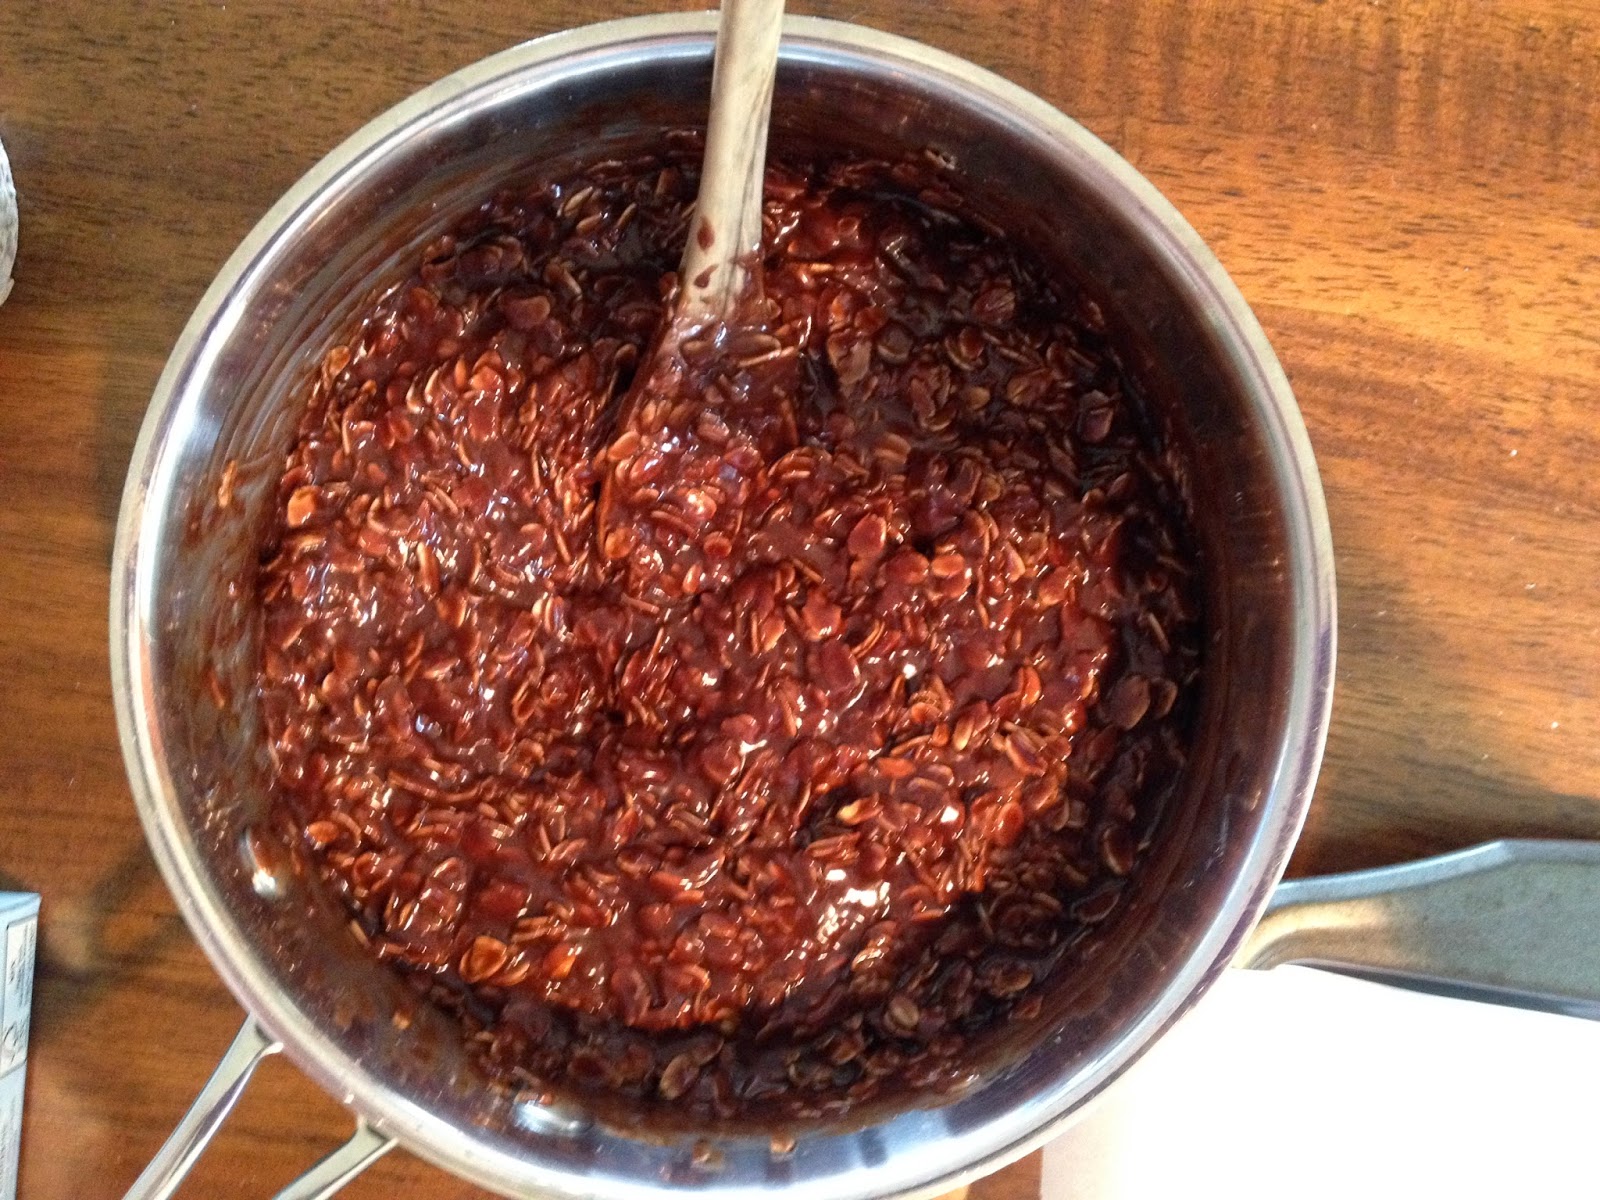
In a large sauce pot, mix the cocoa, milk, sugar and butter and bring to a boil.  Next mix in the oats, peanut butter and vanilla and mix until well combined.  Remove from heat and drop by Tablespoons onto cookie sheets lined with parchment paper.  This mixture will cool quickly, so remember to work fast.  Allow the cookies to cool completely and then place in air tight container to store. 


They may not be the most perfect looking round cookies, but to my husband, these are the best cookies out there.

Happy Baking and ENJOY!!


Sunday, July 20, 2014

Cookie Dough Brownies


Okay, so here is the second brownie recipe that I promised you.  This one is AWESOME!!  It is definitely a crowd pleaser and is great for large groups.  It is an easy recipe that really packs a lot of flavor.  It's multilayer taste gives these brownie a two thumbs up. 

I recently made these over the 4th of July weekend and brought them to a family picnic.  As soon as people saw them, they were dying to find out what they were and when could they eat them.  My nephew kept trying to sneak them in before dinner.  Once we did cut into them, everyone was amazed at how good they were and even came back for seconds and thirds.  I think by the next day there may have been one piece left.

This is by all means a keeper that I will be sure to make again and again for friends and family alike.

Here is what you need.
 Brownie:
4 eggs
1 cup canola oil
2 cups sugar
2 teaspoons vanilla extract
1 1/2 cup flour
1/2 cup cocoa
1/2 teaspoon salt
1/2 cup chopped walnuts (Optional)

Cookie Dough:
1/2 cup butter room temperature
1/2 cup packed brown sugar
1/4 cup sugar
2 Tablespoon milk
1 teaspoon vanilla
1 cup flour

Glaze:
1 cup semisweet chocolate chips
1 Tablespoon shortening
3/4 cup chopped walnuts (optional)

Preheat you oven to 350 degrees F and grease a 9x13 inch baking pan.  In a large bowl, beat eggs, oil, sugar and vanilla until well blended.  In a separate bowl whisk flour, cocoa, and salt, and then gradually beat into the egg mixture.  Stir in walnuts if you desire.

Pour into greased baking pan and bake for 30 minutes or until toothpick comes out clean.  Cool the brownie completely before moving on to the next step.


For the Cookie Dough layer, cream the butter and sugars together until light and fluffy.  Beat in milk and vanilla, and then gradually beat in the flour.  Once brownie is completely cool, spread over the brownie and chill until the Cookie Dough layer is firm. 


For the Glaze, pour the chocolate chips into a microwave safe bowl, add the shortening and microwave until the chocolate is smooth.  Spread over the chilled brownie and top with the chopped walnuts is desired.  Now let the brownie stand until the chocolate glaze is set. 

I highly recommend that you add the walnuts to this recipe.  They give the brownies a great crunch and texture that really add to the appeal of this dessert.  Trust me when I tell you that everyone is going to love these and ask for the recipe.

Happy Baking and ENJOY!!

Thursday, July 17, 2014

Fudgy Brownie with Warm Raspberry Sauce


If there is one thing that I love, it is brownies.  I am a brownie nut.  I love to try different ways to make them and different varies of topping, additives, and flavors.   My family loves when I do this as well.  They love when I tell them that they get to be my taste testers.  I usually try to make a different type of brownie when I go to a family picnic or gathering.  It is a perfect treat for kids and grown ups alike. 

Over the next few blog posts I am going to share two of my favorite brownie recipes.  One is a favorite of mine for a few years now and the other is a new found favorite that I have recently fell in love with.  Both are a great deserts to share and I hope that you will love them just as much as I do. 

So let's get started.

Brownie #1

This is a fudgy cake like brownie that is made from scratch and finished off with a warm raspberry sauce. 

I have to admit that this is one of my favorite date night desserts.  There is just something about this brownie that is best shared between two people.  Now, in a house with 3 kids, date nights are few and far between, but still we did manage to share this dessert.

I love this brownie and it is a very easy brownie to make from scratch.  I was nervous when I first made this, thinking that I could never make a brownie from scratch and have it come out good.  Well, I was dead wrong.  Making brownies from scratch are super easy and they taste so much better then boxed. 

Here is what you need
Brownie:
1 1/2 cups sugar
3/4 cup flour
1 1/2 sticks of melted unsalted butter
1/2 cups cocoa
1 1/2 teaspoons vanilla
1/4 teaspoons salt
3 eggs

Raspberry sauce:
3 Tablespoons sugar
2 teaspoons cornstarch
1/3 cup water
1 10oz package frozen raspberries thawed

Preheat your oven to 350 degrees F and grease an 8 inch square or 9 in round pan. 
Mix together the sugar, flour, butter, cocoa, vanilla, salt and eggs in a medium bowl using either a wooden spoon or wire whisk.  Once all the ingredients are mixed together, pour into the greased pan and bake for 40 to 45 minutes or until toothpick comes out clean. 


While the cake is baking you can prepare the Raspberry sauce.  In a small 1 quart sauce pan, mix the sugar and cornstarch together.  Add the water and raspberries and cook over medium heat stirring constantly, until the mixture thickens and begins to boil.  Continue to boil for 1 minute. stirring constantly.  Remove from heat.  Now you can either strain out the seeds or you can leave them in.  This step is totally up to you.  I know that my husband likes the seeds, so I leave them in, but if you don't, just take the sauce and strain through a strainer to remove any seeds. 


Once the brownie is cool you can serve with the sauce either warm or at room temperature.  Once again my family likes the sauce warm, but it is up to you. 

This is a perfect after dinner dessert that I hope you will come to love as much as I do.

Happy Baking and ENJOY!!

Tuesday, July 15, 2014

Coffee Cake!!


I am not a huge breakfast person.  Oh I know it is the most important meal of the day and I do eat it, but I am always looking for new ways to make my day start better and for that to happen I need a good breakfast.  I am definitely one of those people who needs to have a cup of coffee in the morning in order to function and I really love flavored coffees too.  My husband thinks I am nuts about that, but who can not love a good cup of Blueberry coffee!!  Definitely not me!!

Having three kids at home for the summer means that I don't always get that hot cup of coffee that I crave, but at least I get it.  I must confess that there are many days that when my husband leaves for work at 5:30am I will get up just to have a cup all by myself and savor the silence before the house becomes awake with my crazy, but beautiful kids.  I really enjoy this quite time.  I'll sit and watch the sun rise and mentally plan out my day.

With this planning, comes the conclusion that I am not all for a big  breakfast, especially if I am in the middle of laundry and cleaning.  I like to be able to eat on the run so to say.  This of course brings to mind one of my favorite things to eat for breakfast and that is Coffee Cake.  To me this is a great addition to anyone's day.  How can you not love to goodness of a sweet, crumbly cake topped with a sweet, crumbly brown sugar topping?  Top this off with a steaming cup of your favorite coffee and let me tell you, you are in heaven.  

Coffee cake has always been one of my favorite foods.  I used to love to eat it whenever I could and I will admit that for a very long time I was addicted to Tastykake Coffee Cakes.  OMG those things are so good.  I have tried a lot of recipes to find one that I like, and let me tell you this was not easy.  Not that I am super picky, but none of them really worked for me.  Even this recipe that I found I tweaked, but through trial and error I was able to make a great coffee cake that got rave reviews from my family, and you know if they like it that it has to be good.

Here is what you need:
Cake:
2 cups of flour
3/4 cup sugar
2 teaspoons baking powder
1/2 teaspoon salt
1/2 cup cold butter
1 egg
3/4 cup milk
1 1/2 teaspoon vanilla

Crumb Topping:
1/4 cup flour
2/3 cup brown sugar
1 teaspoon ground cinnamon
1/4 cup cold butter

Preheat your oven to 350 degrees F.  Grease two 9 inch round cake pans.  Make to Crumb Topping by combing the flour, brown sugar and cinnamon in a medium bowl.  Cut in butter (I used a pastry cutter for this part, but a fork can work just a well) until the mixture resembles crumbs and then set aside.


Next in a larger bowl, combine the flour, sugar, baking powder and salt together.  Again cut in the butter like you did for the Crumb Topping.


Now, crack the egg into a measuring cup and then add the milk until you have 1 full cup.  Add the vanilla and carefully mix together.


Carefully pour into the dry mixture and mix until it is all moistened.  Be careful not to over mix it.


As close as you can, separate the batter equally into the two cake pans and sprinkle with the Crumb Topping.


 Bake for 25-30 minutes or until toothpick comes out clean.  Allow to cool slightly before serving.


I have to admit that I made two of these, and the is really only one left.  I love it when the food I make disappears. 

Happy Baking and ENJOY!!


Thursday, July 10, 2014

Minion Cup Cakes


What is cooler than Friday the 13th with a full moon?  Well how about Friday the 13th, with a full moon and it being your birthday!!  That is exactly what happened to my middle daughter Paige.  June 13th happens to be her birthday and this year it fell on a Friday and it also happened to be a full moon as well.  She thought that this was the coolest thing ever, and how could it not.  She turned eight this year and all she wanted to do for her birthday was to go Go Kart Racing, yes, you heard me correctly, my little girl LOVES racing and has recently discovered a love for Go Karts.  It is an addiction that is in her blood.  She is very much her fathers daughter and racing just proves that even more.  She is the fourth generation of racers in our family and only the second female to race.  She has already scored two feature wins and three second place finishes this season.  She loved everything about racing just as much as her Daddy does. 

Unfortunately there happened to be a bad storm on this, her birthday and the race track had canceled racing for the night.  Paige was very heart broken and I felt bad for her.  She looked forward to racing on her birthday and was hoping to bring home another feature win, but it was not meant to be.  So we celebrated her birthday with another family tradition instead.

Every year for your birthday, the birthday kid gets to pick what they want for dinner and no one can complain about it.  It is the birthday kids favorite meal and they can have what ever they want.  In true Paige fashion, my little girl picked Taco's for dinner.  I never really have to wonder what her birthday dinner will be, she is pretty consistent in her dinner choice.  So we had Taco's for dinner and after that I had made her choice of birthday cake, or in this instants birthday cup cakes.  Paige had asked me to make her Minion cup cakes and like the amazing mom that I am, I happily agreed.  She was so excited for the cup cakes she could hardly wait till dinner was over to dig into them.  As you can see from her expression, she was ready to eat cake.

These cup cakes were really very simple and I have to admit that I had a lot of fun making them.  My sister was a big help as well.

Okay, so here is what you need:
1 box of your favorite cake mix (I used Pillsbury Devil Food Cake)
2 boxes of Twinkies
Black decorating icing
Butter cream frosting (directions below)
#3 decorating tip
Wilton Royal Blue Icing Color

 Butter Cream Frosting:
2 Sticks Unsalted Butter (room temperature)
2 Cups Powdered Sugar
2 teaspoons Vanilla
3-4 Tablespoons Milk

Make the cup cakes according to the directions.  The only change that I made, was instead of using oil, I used Applesauce instead.
 
To make the Butter cream frosting, you simple take 2 sticks of Unsalted room temperature butter and cream it in the mixer.  Next add 2 cups of Powdered Sugar, you can add more sugar if you like a sweeter icing.  Add the Vanilla and mix together, scraping down the sides of the bowl to ensure proper mixing.  Next add the milk one Tablespoon at a time until you get the desired consistency.  Save a small amount of this icing for the Minions eyes.  Mix the remaining amount of icing with a small amount of the Royal Blue color.  Be sure the mix this well, so that the color is even.

While the cup cakes are cooling, you can get started on the faces of your Minions.  To do this, I took a cookie sheet lined with parchment paper and placed the Twinkies on it.  Then I took a knife and cut the Twinkies in half.  This will give you two Minions per Twinkies.  Next using the Black decorating Icing and the #3 tip, I drew on the faces of the Minions.  I then used the uncolored Butter Cream Icing and an additional #3 tip to give the Minions their eyes.  Have some fun with their faces.  I made some happy and others mad.  Paige got a kick out of this, because they did not all look the same.

Once the cup cakes were cooled, I took the Blue Butter Cream Icing and using an off set spatula, I frosted the cup cakes.  While I was doing this, my sister helped to place on Minion on each cup cake, giving each one a secure push to ensure they did not come off.  Once they were all iced and topped off, we set up our Minion army and presented to the Birthday girl.  She totally loved them and that made me one happy mom!